Draw A Map Route

The art of map-making and navigation has evolved significantly over the centuries, and with the advent of digital technologies, creating a map route has become an essential skill for travelers, adventurers, and even everyday users seeking guidance. This article delves into the intricacies of drawing a map route, offering a comprehensive guide to creating accurate and visually appealing maps. We'll explore the various tools, techniques, and considerations that go into map-making, ensuring a clear and informative journey for all readers.
Understanding the Basics: Map Route Essentials

Before we embark on our journey of drawing a map route, it’s crucial to grasp the fundamental concepts that underpin this process. A map route is more than just a line connecting two points; it’s a representation of a path that provides guidance, highlights landmarks, and conveys essential information to travelers.
Key Elements of a Map Route
- Start and End Points: Clearly defining the origin and destination is the first step. These points should be precise, often represented by latitude and longitude coordinates or significant landmarks.
- Waypoints: These are intermediate locations along the route, such as rest stops, viewpoints, or specific attractions. Including waypoints enhances the utility of the map, offering opportunities for exploration and discovery.
- Distance and Time Estimates: Providing estimated distances and travel times between points is crucial for trip planning. This information helps users gauge the feasibility of their journey and make informed decisions.
- Terrain and Road Conditions: Map routes should indicate the nature of the terrain, whether it’s a paved road, a hiking trail, or an off-road adventure. Additionally, highlighting potential obstacles or challenging sections adds to the map’s practicality.
| Element | Description |
|---|---|
| Start/End Points | Precise coordinates or landmarks. |
| Waypoints | Intermediate locations for exploration. |
| Distance/Time Estimates | Guides users in trip planning. |
| Terrain/Road Conditions | Indicates the nature of the journey, from paved roads to off-road adventures. |

The Importance of Accuracy
Accuracy is paramount when drawing a map route. Even a slight deviation from the actual path can lead to confusion and potential danger, especially in remote or unfamiliar areas. Modern technologies, such as GPS and satellite imagery, have significantly improved the precision of map-making, but it’s essential to cross-reference data from multiple sources to ensure reliability.
Tools of the Trade: Map-Making Equipment

Drawing a map route involves a combination of traditional tools and modern technologies. Here’s an overview of the equipment you’ll need to create accurate and visually appealing maps.
Digital Tools for Map Creation
In the digital age, a wide array of software and online platforms are available for map-making. Some popular options include:
- GIS (Geographic Information System) Software: These powerful tools, such as ArcGIS and QGIS, offer advanced capabilities for map creation, analysis, and data visualization. They are particularly useful for professionals and researchers.
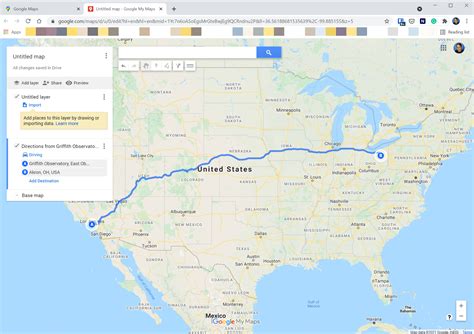
- Online Map Creators: Websites like MapBox, Google My Maps, and MapMe offer user-friendly interfaces for creating custom maps. These tools are ideal for beginners and those seeking simplicity.
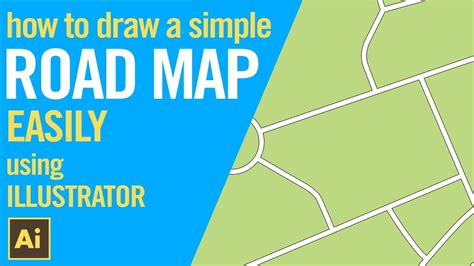
- Illustration Software: Programs like Adobe Illustrator and Inkscape can be used to create detailed, hand-drawn maps with precise measurements and symbols.
Traditional Map-Making Supplies
For those who prefer a more traditional approach or wish to add a personal touch, here are some essential supplies:
- Base Map: Start with a high-quality base map that includes essential features like topography, water bodies, and major roads. You can find these maps online or in specialized stores.
- Drawing Tools: Fine-tipped pens or pencils are ideal for drawing precise routes and adding details. Consider using different colors or line weights to differentiate between primary and secondary routes.
- Compasses and Rulers: These tools help maintain accuracy when drawing routes and adding scale measurements.
- Color Pens/Pencils: Colored pencils or fine-tipped markers can be used to add depth and interest to your map, highlighting specific features or points of interest.
Step-by-Step Guide: Drawing a Map Route
Now that we’ve covered the essentials and gathered our tools, let’s delve into the step-by-step process of drawing a map route.
Step 1: Define Your Route
The first step is to determine the origin and destination of your route. Consider the purpose of the map and the needs of your audience. Are you creating a map for a hiking trail, a road trip, or a city tour? The route’s definition will influence the level of detail and the features you include.
Step 2: Gather Data
Collect relevant data for your route. This may include GPS coordinates, satellite imagery, or field notes. Cross-reference multiple sources to ensure accuracy. For example, you can use online mapping tools to gather initial data, then verify it with local guides or official sources.
Step 3: Choose Your Tools
Select the tools that best suit your needs and skill level. If you’re comfortable with digital map-making, opt for GIS software or online map creators. For a more hands-on approach, gather your traditional map-making supplies.
Step 4: Create the Base Map
Start with a clean base map. If using digital tools, import or create a blank map. For traditional map-making, use a high-quality base map as your canvas. Ensure the map includes essential features like terrain, water bodies, and major roads.
Step 5: Add Waypoints and Landmarks
Identify and mark key waypoints and landmarks along your route. These could be rest stops, viewpoints, historical sites, or any other points of interest. Clearly label these locations and provide additional information, such as brief descriptions or opening hours.
Step 6: Draw the Route
Using your chosen tools, draw the route from start to finish. Ensure the line representing the route is clear and easy to follow. Consider using different colors or line weights to differentiate between primary and alternative routes.
Step 7: Add Annotations and Details
Enhance your map with additional information. Include distance and time estimates for different sections of the route. Highlight challenging or interesting sections, and provide tips or warnings where necessary. Consider adding symbols or icons to represent specific features, such as campsites or fuel stations.
Step 8: Verify and Test
Before finalizing your map, verify the accuracy of the route and all the information you’ve included. Test the map by following the route yourself or with a small group. Gather feedback and make any necessary adjustments.
Step 9: Share and Distribute
Once your map is complete and accurate, share it with your intended audience. Consider different distribution methods, such as printing physical copies, sharing digital files, or embedding the map on a website or app.
Conclusion: The Art of Map-Making
Drawing a map route is both an art and a science. It requires a blend of technical skills, creativity, and an understanding of the needs of your audience. By following the steps outlined in this guide and leveraging the right tools, you can create accurate, informative, and visually appealing maps that enhance the travel experiences of others.
How do I ensure the accuracy of my map route?
+Accuracy is crucial when creating a map route. To ensure precision, cross-reference data from multiple sources, including GPS coordinates, satellite imagery, and local knowledge. Verify the route by testing it in real-world conditions.
What are the benefits of using digital tools for map-making?
+Digital tools offer several advantages, including ease of use, access to a wealth of data, and the ability to create detailed, interactive maps. They also allow for quick updates and easy distribution.
How can I add a personal touch to my map?
+If you prefer a more traditional approach, use fine-tipped pens or pencils to draw your map by hand. Add color and texture with colored pencils or markers. Include personal notes, anecdotes, or illustrations to make your map unique.


